This is the start of an inspiration patch, where I hope that fellow scrappers and creators will come and find some inspiration, or even leave some inspiration for me.
Showing posts with label Mixed Media Cards. Show all posts

Monday, 31 December 2018

Last Post of the Year - Just Because Card - FabScraps - All Aboard Collection


Hello Everyone

Yes I did fall off the end of the earth for a bit...apologies!!!!
The last 2 months of the year were extremely busy for me with scrapping projects and a huge work project that goes live on 16 Jan!
So yes, I have been rather busy but had a good Christmas and I am looking forward to 2019, with excitement and eagerness!
I am positive this is going to be a life changing year! ;-)

Blessings and wishes to every one of you! I wish you every health, every happiness, every creative seed and everything good!

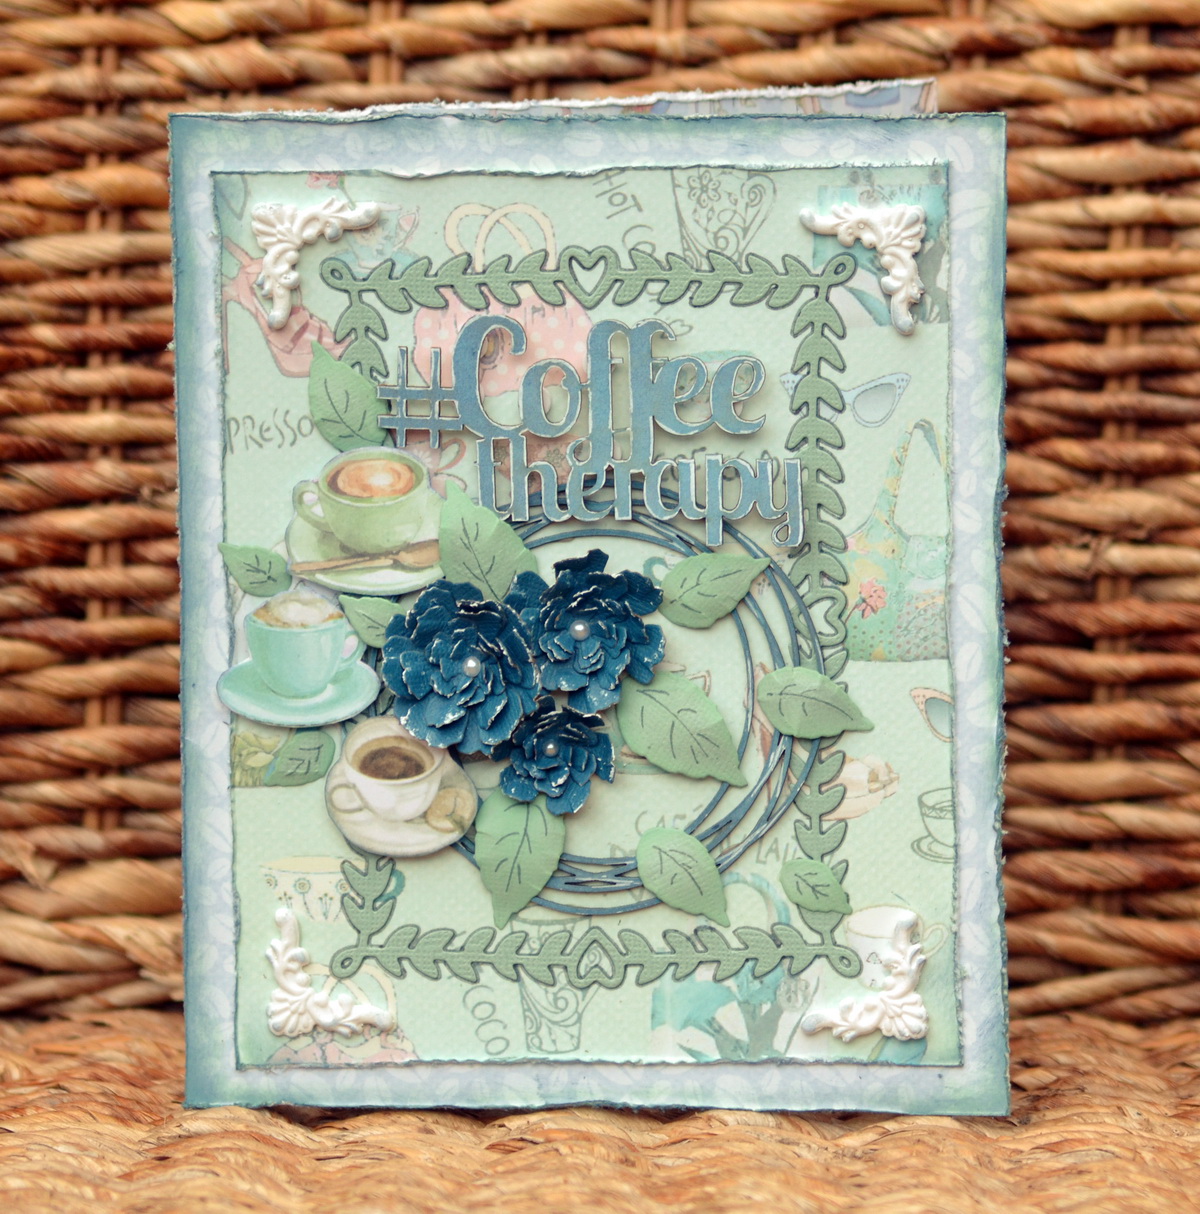
To end the year, I want to share a FabScraps project with you, using the beautiful All Aboard Collection.

Just Because...


I hand made all the flowers and used lots of texture in between.


Definitely a favourite card for me and will be used with much love and card! ;-)

Enjoy this last day of 2018 and thank you so much for your support and comments always!
It is truly appreciated!

Have a fabulous day!
Denise x

Monday, 13 August 2018

Choose to Blossom Card - FabScraps Pink Lemonade

Hello Everyone

I have a fresh and happy card to share with you today! ;-)
I used the fresh and bright collection from FabScraps.


I used the super stencil from FabScraps to create the leaves and then fussy cut bits and flowers
to create the cluster.

I also wanted to use the gorgeous flamingo, so fussy that to use on the card too.


The title, Choose to Blossom, is also a super stamp from FabScraps and I love the sentiment!

It's a simple but pretty card! ;-)

Have a super Monday...
Once again...your visits and comments are sincerely appreciated!
Cheers for now!
Denise x

Thursday, 10 May 2018

Coffee Therapy Card - FabScraps Coffee Confessions Collection

Hello Everyone

I have a second card to share with you today, using Coffee Confessions!
It is just a gorgeous and fun collection.


I really so love the colours on this card! ;-)


I hand made the blue flowers and love how they pop off this card.

I have a step by step tutorial for this project.

For This Project You Will Need:

FabScraps Coffee Confessions Collection paper range: C103 006, 007, 008
FabScraps DC103 005- Die Cut Word
Green and blue cardstock
Tim Holtz Distress Oxides: Blue Jeans, Iced Spruce
White resin corners
White pearls
White Gel Pen
White Gesso
BoBunny Die: Ever After Card Die
Grey fineliner
Circle Chipboard

Instructions:
1. Sizzix Big Shot Machine:
Cut 1 x the die-cut frame from the green cardstock.
Cut 6 x the flowers and leaves from the green and blue cardstock
Make 3 sized flowers and assemble the flower layers with glue.
Tweak all the petal edges with a tweezer and then add white gesso highlights to the edges
2. Cut the 2 patterned papers to size and distress the edges.  Ink the edges with blue jeans distress oxide ink and adhere the green patterned paper to the blue beans patterned paper base.
3. Using blue jeans distress oxide, colour the circle chipboard and word pieces. Use a white gel pen to add highlights, once dry.
4. Adhere the frame die-cut to the centre of the card. Outline the die-cut with a grey fine-liner.
5. Fussy cut the coffee cups from the patterned paper and ink the edges with blue jeans distress oxide ink.
6. Adhere and raise the elements on the card, as per the photo.
7. Adhere the resin corners to the card.
8. Add grey fine-liner details to the leaves and adhere these, along with the handmade blue flowers to the card. Add a pearl to the centres. 
9. All Done!

Thanks again for stopping by!
I really appreciate your visits!
Cheers for now
Denise x

Wednesday, 9 May 2018

Special Card - FabScraps Coffee Confessions Collection

Hello Everyone

I created some cards with this pretty collection and I am sharing one with you today.


It's quite a girly card, with all the fun and girly elements.


I handmade the pink flowers too, using my "so loved" Sizzix Small Tattered Florals die set.


I also have a step by step tutorial below:


For This Project You Will Need:
·         FabScraps Coffee Confessions Collection paper range: C103 003, 004, 005,006; MC103 001A Card Kit
·         FabScraps Stencil: DS085
·         Green and pink cardstock
·         Tim Holtz Distress Oxides: Frayed Burlap, Iced Spruce
·         Tim Holtz Stamp: Papillon
·         Sizzix Thinlits Small Tattered Florals
·         White resin corners
·         White pearls
·         BoBunny pearlescent: Chocolate
·         BoBunny Die: Darling Doily
·         Grey fineliner

Instructions:
1.       Sizzix Big Shot Machine:
·         Cut 1x doily from C103 005
·         Cut 3x the flowers, from the pink cardstock
·         Make various sized flowers and assemble the flower layers with glue.
·         Tweak all the petal edges with a tweezer and then add Frayed Burlap to the edges
2.       Cut the cardstock and stripe patterned paper to size and distress the edges.  Ink the edges with frayed burlap distress oxide ink and adhere the patterned paper to the card.
3.       Using Iced Spruce distress oxide, stamp the entire stamp to the central part of the card.
4.       Using the FabScraps stencil and an ink sponge, stencil the pattern, with frayed burlap distress oxide, to the centre of the card. Allow this to dry. Outline the stencilling with a grey fine-liner.
5.       Fussy cut the various elements from the patterned papers and ink the edges with frayed burlap distress oxide ink.
6.       Adhere the doily and the fussy cut elements and card kit elements to the card, along with the resin corners.
7.       Add the handmade pink flowers to the card. Add a pearl to the centres.
8.       Using the chocolate pearlescent, add some dots for detail on the green handbag.
9.       All Done!

Thanks ever so much for stopping by!
I hope you have a fabulous day!
Denise x

Wednesday, 17 January 2018

Mixed Media Christmas Cards

Hello Everyone

I promise, these are the last 2 Christmas cards that I will be sharing for a while! ;-)
LOL... but yes...I have already said to myself again, that you need to make at least 1 or 2 a month, so that by the time Christmas rolls around again, I have them on hand! ;-)
This seems to work very well for me! ;-)

Anyways..here they are.


I really used so many things from my stash, some old rub-ons and the papers etc.
It really was good to de-stash.

Again also, the little red flowers are handmade! I really love them.
Here's a closer look below.


The flowers and the twig die-cut are from a fabulous set from Sizzix, called Small Tattered Florals.
This is one of the best sets that I have bought for a long time and it has been used over and over and is just fabulous! ;-)

Image result for sizzix small tattered florals

Here is the second card, using lots of BoBunny goodness.


I mixed and matched new and old goodies and this was the result! ;-)

Well those are my Christmas cards done and dusted!

Thanks once again...for always popping by!
I really appreciate it so much!
Have a fabulous day!
Denise x

Tuesday, 16 January 2018

Mixed Media Christmas Cards

Hello Everyone

I still have some Christmas Cards to share and I hope that you won't get bored of them, now that Christmas is past and the New year has begun, with a bang! ;-)

Here is the first one.


I used some ScrapBerry papers, along with die-cuts and coloured, fussy cut stamped items.


The centre circle was created by using the resist technique with acrylic paint and distress inks.

I really loved the colours of this card and this was definitely one of my favourites.

Here is the second card.


I really loved this craft card too and the little red flowers are handmade. Here's a closer look below.


I love how the colours pop against this kraft background. I really think I must use kraft more often.

Thanks so much for popping by my blog today!
I always so appreciate your visits and comments!

Have a fabulous day!
Denise x

Wednesday, 20 December 2017

Hello Everyone

I was up on the BoBunny blog here with some Christmas Cards.
I used the Carousel Christmas collection, which is just so very pretty! ;-)

Here are some sneak peeks, I would love it if you popped over and had a look.

Carousel Christmas_Christmas Cards_Denise_03 Dec_03

and

Carousel Christmas_Christmas Cards_Denise_03 Dec_04

I handmade these little white flowers too! ;-)

BoBunny Supplies:
Patterned Paper: Noel, Peace, Wonder, Joy, Floral / Carousel Christmas
Cardstock: Jade Dot
Pearlescent: Sugar
Die-cuts: Christmas Card, Congratulations, Portrait Frame, Love Square, Ever After

Thanks so much for stopping by!
I really appreciate the visit!
Have a fabulous day!
Denise x

Friday, 21 July 2017

Mixed Media Cards - BoBunny Serendipity Collection


Morning Everyone

 
Today I have some BoBunny goodness to share with you.
I used the fabulous Serendipity Collection.

I made some cards and I also made some flowers.
Mixed Media Cards by Denise van Deventer using BoBunny Serendipity and Stencil Paste and Pentart Wax Paste

Here's a look at them individually.
Mixed Media Cards by Denise van Deventer using BoBunny Serendipity and Stencil Paste and Pentart Wax Paste

Mixed Media Cards by Denise van Deventer using BoBunny Serendipity and Stencil Paste and Pentart Wax Paste

On both of these cards I used stickable stencils and gesso. I used these stencils in different ways and created two similar, yet different cards.
On the yellow one, I coloured the stencilled gesso with some distress oxide inks and then cut out the centre of the stencilled design with a die-cut. I also added some stencilled corners with the gorgeous BoBunny stencil paste to this card. The blue flowers are also handmade and are layered die-cuts, with stamens in the middle. You can see the stencilling and the flowers below.
Mixed Media Cards by Denise van Deventer using BoBunny Serendipity and Stencil Paste and Pentart Wax Paste

On the blue card, I actually cut out the stencilled design and then rubbed some wax paste over the stencilling.
Mixed Media Cards by Denise van Deventer using BoBunny Serendipity and Stencil Paste and Pentart Wax Paste

Here's a look at the stencilled design before I added the extra bits. I had also rubbed over the wax paste.  It added a gorgeous glimmer to this stencilled design.
Mixed Media Cards by Denise van Deventer using BoBunny Serendipity and Stencil Paste and Pentart Wax Paste

Thanks so much for stopping by my blog today.  
Have a fabulous day!
Denise x

BoBunny Supplies:Patterned Paper: Aviary, Songbird, Stripe, Flight/ Serendipity
Cardstock: Brilliant Blue Dot
Noteworthy: Serendipity
Chipboard:Serendipity
Stickable Stencils: Love

Stencil Paste: Vanilla Pearl
Pearlescent: Brilliant Blue
BoBunny Gesso

Pentart: Chameleon Wax Paste

Monday, 20 June 2016

Trio of Fathers Day Cards - BoBunny Fire Cracker Collection

Hello Everyone

I hope that you had a stunning weekend and also had a super Father's Day yesterday.
We had a super family day except for the fact that my sister ended up in hospital.  This time with gall stones and an infected gall bladder.
The poor girl has really been through a lot lately and so I hope she recovers soon!

In any case, I made some Fathers Day cards for hubby, Dad and my brother in law.
I used the fun Fire Cracker Collection from BoBunny.

Here's the first one.


The second one I really loved and the design was really cute.


I took a snap of the inside to also show you.


Here's the last one.


I had a lot of fun creating these and I think they were well received.

Thanks so much for stopping by!
Hope to see you back soon!
Denise x

Wednesday, 13 January 2016

Cards - FabScraps Teens Collection

Hello Everyone

I am sharing some more FabScraps projects today and these 2 cards are currently being displayed at CHA.  It was so exciting to see some of the photo's on the FabScraps FB page yesterday and see some of my projects there....really so very honoured and thankful! ;-)

So here is the first card.


This Teens collection is really funky and fun and admittedly, at first, I was unsure about this collection.  But after creating some projects, I was thrilled by this collection and some of my favourite projects were made using this collection. I will share those with you, over the next couple of days.

Supplies List:
Patterned Paper: FabScraps #Teens Free Range C80 004
#Teens Journal Pack: MC80001A
#Teens Stickers: Speech Bubbles ST80 001
Die-Cut Gray Chipboard : Cogs DC80 013
Chipboard: Stars
Cardstock: White
3D Adhesive Foam
Fine tipped pen: Black
Stamp sentiment: Follow Your Dreams
Black pearls
Pigment ink: Grey and Black

Instructions:

  1. Cut a piece of white cardstock 29,5cm x 13cm and fold in half.  Distress and ink the edges with grey pigment ink.
  2. Cut a piece of #Teens Pattern X paper, 13,5cm x 13,5cm and distress the edges.
  3. Cut a piece of #Teens Pattern fingerprint paper, 11cm x 12cm and distress the edges.
  4. Stick down the X patterned paper, at an angle to the card, as per the photo.
  5. Stick down the fingerprint patterned paper, at an angle to the X patterned paper, as per the photo.
  6. Colour the chipboard cogs with black pigment ink and fussy cut 3 circles from the Free Range pattern paper.
  7. Stick the cog chipboard onto the card, as per the photo.
  8. Stamp the “Follow Your Dreams” sentiment onto the blue speech bubble with black pigment ink and ink the edges with grey pigment ink.
  9. Raise and adhere the speech bubble, as per the photo.
  10. Outline the star chipboard pieces with a fine tipped black pen and adhere, as per the photo.
  11. Raise and adhere the 3 fussy cut circles and add the black pearls.
  12. Lastly add the hand sticker.

This was the second card that I created.


Supplies List:
Patterned Paper: FabScraps #Teens Free Range C80 004
#Teens Journal Pack: MC80001A
#Teens Stickers: Speech Bubbles ST80 001
Die-Cut Gray Chipboard : Cogs DC80 013
Chipboard: Stars
Cardstock: White
3D Adhesive Foam
Fine tipped pen: Black
Stamp sentiment: Follow Your Dreams
Black pearls
Pigment ink: Grey and Black

Instructions:
  1. Cut a piece of white cardstock 29,5cm x 13cm and fold in half.  Distress and ink the edges with grey pigment ink.
  2. Cut a piece of #Teens Pattern X paper, 13,5cm x 13,5cm and distress the edges.
  3. Cut a piece of #Teens Pattern fingerprint paper, 11cm x 12cm and distress the edges.
  4. Stick down the X patterned paper, at an angle to the card, as per the photo.
  5. Stick down the fingerprint patterned paper, at an angle to the X patterned paper, as per the photo.
  6. Colour the chipboard cogs with black pigment ink and fussy cut 3 circles from the Free Range pattern paper.
  7. Stick the cog chipboard onto the card, as per the photo.
  8. Stamp the “Follow Your Dreams” sentiment onto the blue speech bubble with black pigment ink and ink the edges with grey pigment ink.
  9. Raise and adhere the speech bubble, as per the photo.
  10. Outline the star chipboard pieces with a fine tipped black pen and adhere, as per the photo.
  11. Raise and adhere the 3 fussy cut circles and add the black pearls.
  12. Lastly add the hand sticker.

Thanks so much for stopping by!
I really so appreciate your comments and love.

Denise x

Wednesday, 18 November 2015

Christmas Cards - BoBunny Dear Santa

Hello Everyone

Are your weeks also as hectic as mine...??? I think the "silly season" has started on my end of the world and there are just so many things to do in a day!! Anyways...it keeps me on my toes and keeps the heart pumping and beating! ;-)

I made some cards for Christmas from the Dear Santa BoBunny Collection.  This is such a fun and cute collection.

I made 2 similar type, mixed media cards.


Crackle paste has also become of my favourite mediums and of course BoBunny stickable stencils are a must! Really love them! ;-)

I had better crack-le on....LOL....hope you are getting to those Christmas cards and handmade goodies.

Have a super Wednesday!
Denise x


Tuesday, 20 October 2015

Cards - BoBunny Genevieve Collection

Hello Everyone

I have some cards to share with you today! I simply adore the Genevieve Collection and I had some time to play and create.


I love the watercolour background and love the softness that it adds to this card! ;-)


Here's the second card.


The colours of this collection are just fabulous! ;-)


Lastly....a quick picture of my Sally Pally at 4 months...she's gorgeous...


Thanks for stopping by!
Have a super evening!
Denise x

Thursday, 9 July 2015

Mixed Media Cards - BoBunny Juliet Collection

Hello Everyone

In my last post I created some classic and romantic cards with the Juliet collection.  I had so much fun playing with this collection that I decided to create some mixed media cards too.


I really had a lot of fun creating these! I did get some nice ideas and inspiration from the Simply Cards & Papercraft Magazine - Issue 136.  If you are a card maker then this is really a great magazine for some inspiration.

Here's a closer look at the first one.


And here's the second...


It's been really nice to have some time off this week and I have found time to create, in between spending time with the children and also doing stuff that I have wanted to do around the house.  So busy for sure...but really very nice! ;-)

Here's a photo of the kids and little Sally, at the park this week.


Considering it's winter...the days are still reasonably warm.  But yikes, the mornings and evenings are chill!!

Please bear with me,if I have not visited your blog this week....I will be popping in real soon! ;-)
Have a super evening!
Denise x

Thursday, 26 March 2015

Thank You Cards - BoBunny Sweet Life Collection

Hello Everyone

I am so looking forward to Friday! Roll on week-end and some good scrappy time! ;-)

I made some mixed media cards, using the BoBunny stickable stencils and the very pretty and lovely Sweet Life Collection.


I used gesso through the stencils and then did some watercolouring effects.


The butterflies from this collection are so fabulous and so I really wanted to use them.


I love bright and sunny cards...so this was definitely the intention with this one too.

Thanks so much for stopping by!
I hope you have a fabulous day!
Denise x

Saturday, 21 June 2014

BoBunny Mixed Media Cards

Hello Everyone

I hope that you have had a scrappy and restful Saturday! I have managed to catch up on quite a few projects and things, so I am feeling quite pleased with myself.

Anyways, I am up on the BoBunny blog today with some mixed media cards. Please pop along and have a look at all the cards created by the DT, but here are mine.


Enchanted Garden is a fabulous collection and so pretty with it's colours and theme.


Here is a close-up of the gesso, watercolouring and stamping, along with some washi tape.  The new BoBunny stamps are so fabulous...they are great keepers! ;-)

For my second card I used the Modern Miss collection.


Again I did some watercolouring, and also added some drywall tape for texture. I love the vibrant colours on this card.


Check out these awesome new BoBunny stamps.


Panel 0

Thanks so much for stopping by!
I really appreciate your visits!
Have a super evening!
Denise x